Looking for ways to protect your WordPress website pages with a password? Well, then, you’ve arrived at the right place.
It’s super easy to make your site private using the basic content visibility option inside WordPress.
But it won’t allow you to protect the entire website. Especially if you’re a beginner without any coding knowledge, setting up a password for the whole site can be pretty complicated.
So, in this tutorial, we’ll show you how to password protect both individual pages and the entire site.
Please follow the steps with screenshots and you can easily do it in a matter of minutes.
Shall we start?
Here is a quick overview of what you’ll learn in this article –
- Why password protect WordPress pages?
- Password protect a page using the built-in visibility feature in WordPress
- Going to individual posts
- Using the quick edit panel in the page menu
- Limitations of built-in visibility feature
- Create a private WordPress Site/Password protect the entire site using a third party plugin the SeedProd
- Download the SeedProd plugin to your computer, then install it to your WordPress website
- Set up a Coming Soon page
- Add a secret password
- Render a password field on the coming soon page
- Toggle the page from inactive to active
5. More ways to password protect your WordPress Site
Why password protect WordPress pages
Protecting your page content and making it accessible to special members can be a natural requirement. For example, your page may have premium content, and you would only want it to be accessed by paying subscribers, or you have a staging website, the viewing rights to some of its pages should only be retained by your clients for giving feedback.
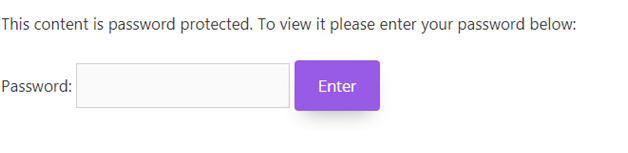
Whatever the reason, a password protected page will only be visible when a visitor successfully enters the (right) password. Wrongly entered, the content remains inaccessible.
Password protect a page using the built-in visibility feature in WordPress
- Going to individual posts
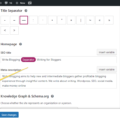
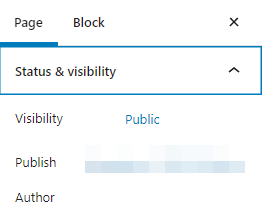
Log in to WordPress as the administrator. Click ‘Pages’ under the dashboard. Locate the page you want to make private, and then click ‘Edit’. Go to the ‘Status and visibility’ in the right sidebar of your edit screen.
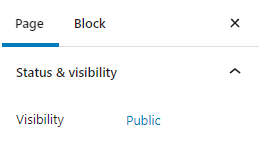
As you can see in the screenshot, the visibility status is set to a button called ‘Public’.
To make desired changes, you should click the button, which will then reveal the ‘Post Visibility’ popup menu.
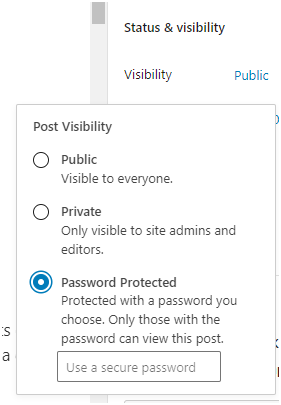
Choose the last option and enter your preferred password in the ‘Úse a secure password’ field. As a rule of thumb, use a strong password.
Finally, click the ‘Update’ button at the top of the page on the right side. Doing this reflects the changes and the page will now restrict unwanted visitors from accessing it.
- Use quick edit panel in WordPress to password protect multiple pages together, without going to the individual full edit page
The quick edit feature, when clicked, reveals title, slug, date, author name, and other information, including password field (which we need).
The panel allows administrators to quickly modify attributes of more than one page on the same screen, and there’s no need to click back to your site’s page index every time you want to add/modify a page’s password. Summed up, if you want to create passwords for multiple pages without going to the individual edit screen, this is going to be very helpful.
To password protect a WordPress page using the above method, please follow these steps –
Click ‘Pages’ from your WordPress install, locate the page you want to make private. Then, click ‘Quick Edit’ and enter your chosen password, before hitting the ‘Update’ button located on the extreme right side of your panel.

That’s it. Now, WordPress will show ‘Protected’ status before the page’s title. And whoever gains access to the page’s content must enter the correct password.
Please note that once a visitor enters the correct password to gain access to a private page, it will automatically unblock all the pages using the same password.
The default password feature allows anyone logged in with the editor or administrator role to access your protected web page. Also, the method does not encrypt your protected page’s content, and whoever has the password can access your page.
Limitations of built-in visibility feature
The visibility option lets you change a page’s status from public to private using a password, but it is not the perfect solution to some situations. For example, your site may be under development and you would want to hide it entirely from the public and search engines, but allow only select users to gain access to your unfinished work for internal communication.
So the next question is, how to password protect an entire website and make it available on purpose to specific users?
At present, the facility to make an entire website private is unavailable in WordPress. So, you will need a third-party plugin and it will do the job. A simple (and affordable) solution is the SeedProd Landing Page builder that comes with optin, coming soon, maintenance mode, and many other powerful features.
Create a private WordPress Site/Password protect the entire site using the SeedProd plugin
- Download the SeedProd plugin to your computer, then install it to your WordPress website
Go to the SeedProd Landing Page Pro plugin page, then pick a plan that matches your needs and follow the steps to sign up as a premium user.
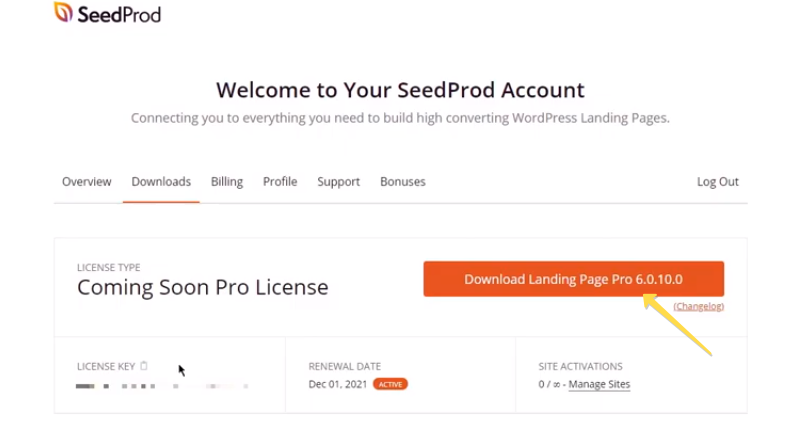
Now, log in to your account to access the SeedProd dashboard.
From there, click the ‘Download tab’ to locate the ‘Download Landing Page Pro (version)’ button in orange, which when clicked will download the .ZIP file on your computer.
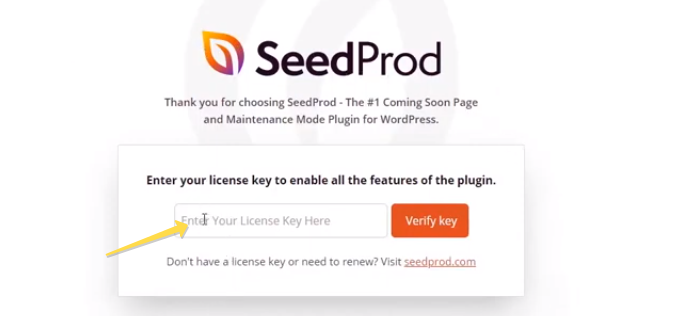
After that, head to the Plugin section in your WordPress install and click ‘Add New’.
Locate the ‘Upload’ Plugin button at the top of the screen, then click ‘Choose file’ to locate the .ZIP file you downloaded on your computer and install it. When the installation is finished, click Activate.
The next screen will prompt you to verify the membership key. Please enter the correct key to start using SeedProd Pro.
In case you are wondering, SeedProd also has a Lite version which you can install for free using the WordPress plugin search option. However it comes with limitations and to use advanced features including protecting your entire site with a password, you need the pro version.
Now that you have installed and activated SeedProd, it will take only a few minutes to password protect your entire site.
The first step is to set up your page.
- Set up a coming soon page
Please follow THIS article to create a coming soon page in WordPress using SeedProd.
SeedProd comes with a host of professionally designed and ready-to-use landing page templates. Use the drag and drop builder to create amazing pages – or begin with a blank canvas.

- Add a secret password
Now in order to set up a password on the coming soon page, you need to follow these steps –
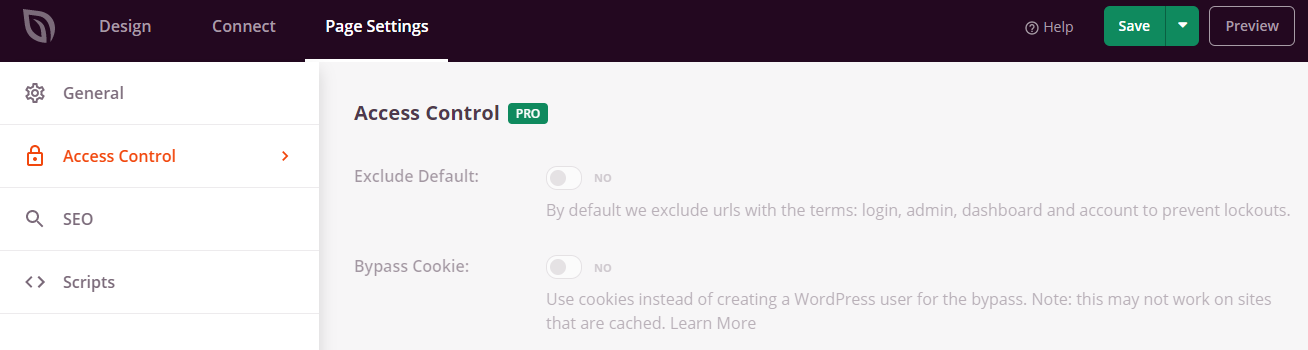
Go to Pages on your SeedProd dashboard, then click ‘Edit Page’. From there, navigate to the ‘Page Settings’ and then the ‘Access Control’ option.
Locate the ‘Bypass URL’ option. There, just after the website URL, you can see a blank box. Enter your password here and finally click ‘Save’ to retain the changes.
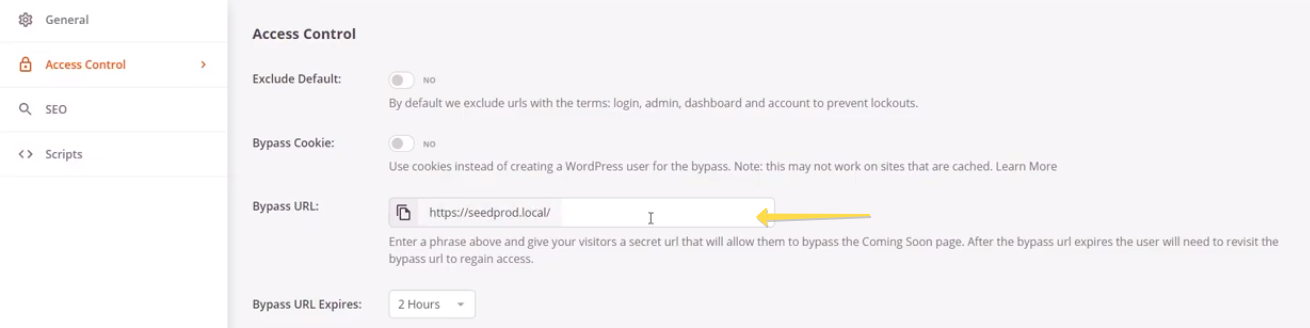
This actually creates a bypassed URL, which is a secret website address that you can give to visitors, who can access your website without bumping on the restricted coming soon page.
The same secret password can also be used by visitors when they access your coming soon page and are asked to enter a password. But for that, you need to render a password field on the coming soon page.
- Render a password field on the coming soon page
First, go to the SeedProd dashboard, and click the ‘Edit Page’ button. Then, scroll down to locate the ‘Advanced block’ section under the ‘Design’ option. Now, drag the Custom HTML code (password input field) from the left-hand panel to your live page editor on the right.
Now, click the block to edit its content. The content is a shortcode seed_bypass_form. Please add this code into the description field with square brackets on either side.
Simply copy it from here – [seed_bypass_form]

This activity renders a password field on your site’s coming soon page, which means users will be asked to enter a password. Click preview to see the changes and Save your work.
To learn more about bypass URL and password protection, please read THIS SeedProd documentation.
- Toggle the page from inactive to active
Finally, do not forget to make the password-protected Coming Soon page live. Go back to the SeedProd dashboard, and switch your page’s toggle status from inactive to active.

That’s it.
Your WordPress website is now password protected, and whoever accesses it does it so by entering the right password that you’ve set.
5. More ways to password protect your WordPress Site
SeedProd’s password protection feature is available to paying users. In case you want to use a free service to protect your entire WP website, Password Protected plugin by Ben Huson is a good choice.
To be updated!